

How to Use a Planner in College: The System That Will Change Your Life as a Freshman
Learn all the best tips about how to use a planner in college! This is going to keep you organized and make your life so much easier.

Note: Affiliate links are included in this article. Check out my disclosure policy for any questions.
When I got to college as a freshman, I considered myself a type-A person who knew everything there was to know about planners and class organization. And I was very mistaken.
Learn from all of my mistakes with these tips to teach you exactly how to use a planner in college. Trust me, it’s way easier to copy someone else’s system than try to figure everything out on your own, while also juggling new classes and new friends.
This post is all about how to use a planner in college!
High school vs. college planners
Now, it wasn’t that my previous planner systems were bad, but I was just slapped in the face with how different high school and college are.
In high school, you are given an assignment/exam a couple of days or weeks before it is due. So, my system (in simple terms) was just writing down what my teachers told me and then highlighting it when it was done. While I intended to continue this through college, I realized some very big differences.
In college, you’ll get syllabi at the beginning of the semester with every assignment, exam, project, and reading you will be expected to do throughout the semester. The planner in me absolutely loved that I was able to have all this information in the beginning. However, I realized my plan for writing down things each day wasn’t going to work anymore.
Immediately, I was confused. Do I write down the assignment in my planner on the day it was due? Or do I write it down on the day I was planning on doing the assignment (the day or two before)?
And this is where my new system came into play, specifically for how to use a planner in college, not high school.
How to use a planner in college
1. pick a planner that works for you
One of the most important steps for learning how to use a planner in college is picking the right one. And while there are plenty of good planners, there’s also a lot of bad ones that will make it harder to stay organized.
My biggest recommendation when you are looking for planners is to find one that has two sections for each day. This is extremely helpful for dividing up exams and big projects, versus smaller assignments and readings. That way, it is easier to see what you have coming up and what you have to work on.
If you want to learn more about how I divide up assignments and put them in my planner, my college survival course is perfect for you. It’ll take everything in this article, plus so much more, and go even more in-depth to teach you everything you need to thrive in college. Click here to check it out!
My absolute all-time favorite planner, and the one I personally use in college, is the digital iPad college planner I designed! This planner has absolutely everything I need to stay organized, without all the extra BS pages that I never use.
Check out By Bri Boutique planners!
I created a customizable planner system for girls who do it all, but want to do it better. Start with a binder, choose your base (academic or weekly), and add the inserts that match your goals—like budgeting, health, or productivity. It’s a planner that actually fits your life, not the other way around.
If you want even more options, check out this article: 10 Best College Planners For Every Type of Student! You will definitely find something you love.
2. color code your classes
Step two of the college planner system is to color code your classes. If you’ve never done this, it is absolutely game-changing and going to make your life a million times more organized.
This is super easy to do: just assign a color for each of your classes.
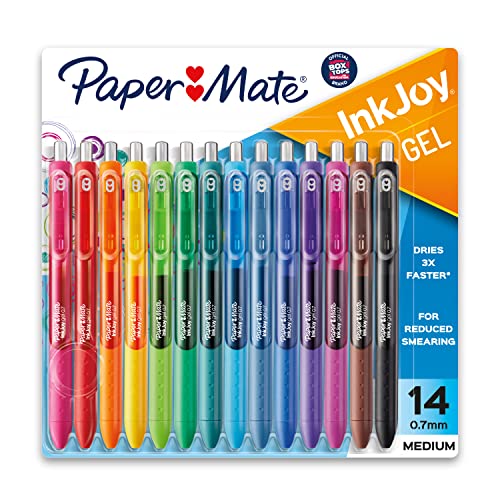
This color will be used for everything. Add the class to your Google calendar in this color, write your assignments for this class in this color pen, and buy any notebooks for this class in this color. That way, everything matches.
These are my favorite pens to help me stick with the color coding in my planner!
3. write everything in at once
This is genuinely one of my favorite parts of the semester. I make it a whole morning or afternoon, get myself my favorite drink, and sit somewhere cute to write out my planner for the semester.
The most important thing to do is add everything, and I mean absolutely everything in your planner at once.
I like to do this one class at a time. I’ll get my planner and the assigned pen color, open up the class canvas page with the syllabus, and get to work.
I go through the entire semester, just for this class, and add all my readings, assignments, projects, exams, and anything else relevant to the class. If there’s anything I don’t have enough information to add, I’ll write it on a Post-it note in the front of my planner so I don’t forget about it.
This is also the time I figure out if I need any textbooks for the class and write down when office hours are.
Once I finish with one class, I go on to the next and keep on going until I’m done with all of them. This is definitely tedious (you’ll basically be going through the entire semester calendar 4-6 times depending on how many classes you have). However, once you finish, you will literally have every single thing in one place.
4. actually use the planner
The last step seems the most obvious but is the most forgotten about.
Now that you’ve taken the time to buy a planner, color code, and write everything in there, you actually have to use it! Don’t waste all the time, energy, and money by using it for a week or two and then forgetting about it.
The beginning is the hardest because you are trying to implement a new habit into your life. Once you get the hang of it, you will realize how much easier it is to manage all your classes with a planner.
This post was all about how to use a planner in college!
Other posts you may like:
